
Brief Overview
This article is intended for patients of Clinic to Cloud practices who will be using the Patient Portal to see and book appointments, pay off any outstanding invoices, and view their clinical information. The Patient Portal can be accessed on any device, providing you access to your clinical and financial information from anywhere, any time.
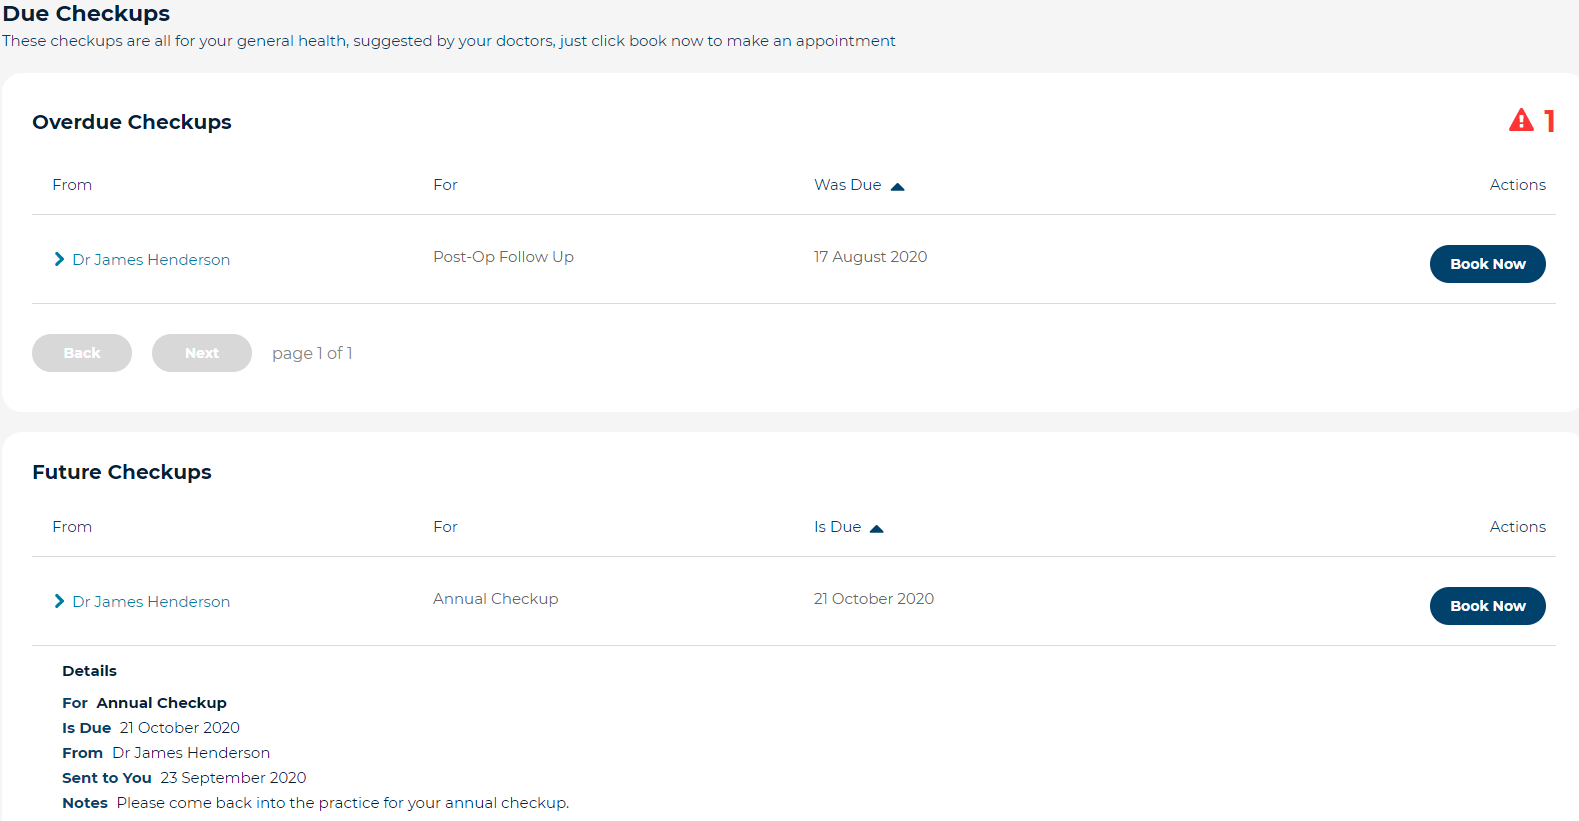
The Due Checkups tab in the Patient Portal tracks the recalls that your practice has organised for you. Recalls are reminders that you must revisit your practice for important reasons such as for post-operative follow-ups, ongoing monitoring of a health condition, an annual check-up, or to discuss the results of recent tests.
Your practice may use recalls to remind you when you should return to your practice.
Short Version
- Visit the Due Checkups tab in the Patient Portal to review your current recalls.
- Use the > arrow beside a Checkup to expand the item and view the details.
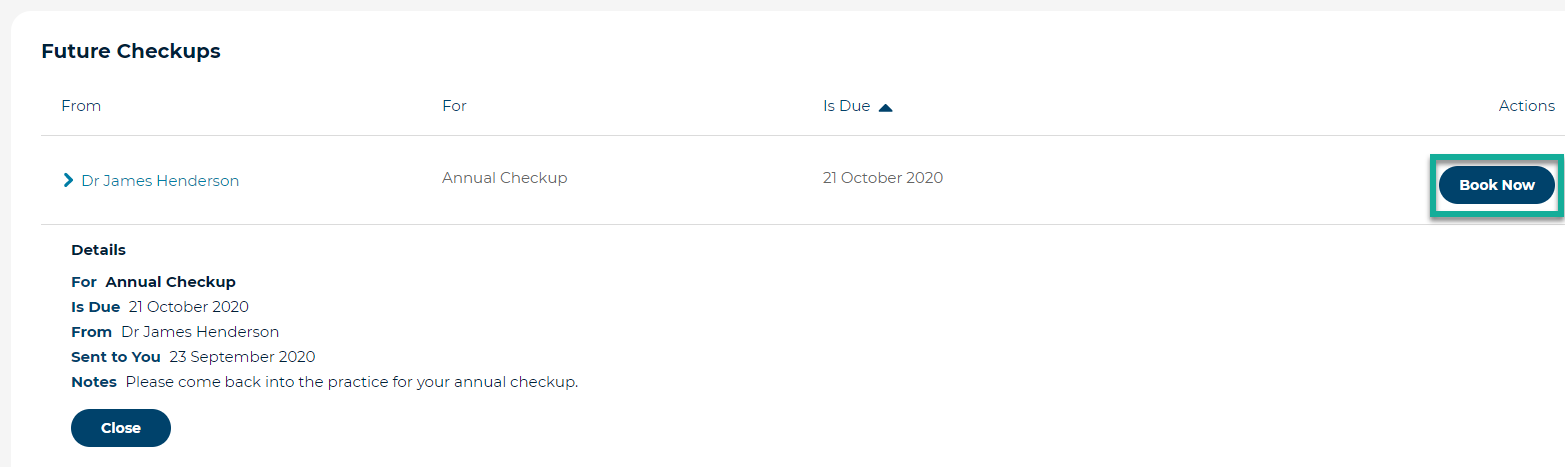
- Click the Book Now button beside an expanded Checkup to organise an appointment.
- Your oldest Overdue Checkup will be displayed first in the list.
- Future Checkups are recalls that have been entered, but are not yet due.
Instructions
If your practice has created Checkups for you, then you may want to organise an appointment using the instructions below:
- Open the Due Checkups tab within the Patient Portal.

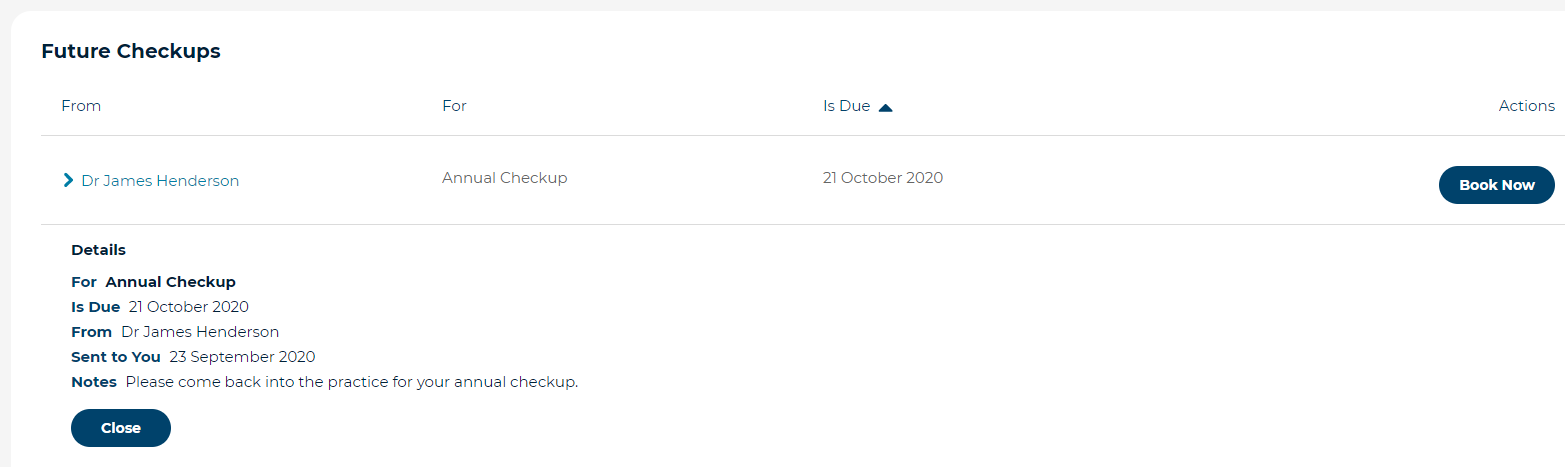
- Click the > arrow beside an Overdue Checkup or Future Checkup to expand the details of the recall. This will show you:
- The reason for the Checkup.
- The doctor who organised the Checkup.
- The due date for the recall.
- The date the Checkup was created.
- Any Notes that have been provided by the practice.
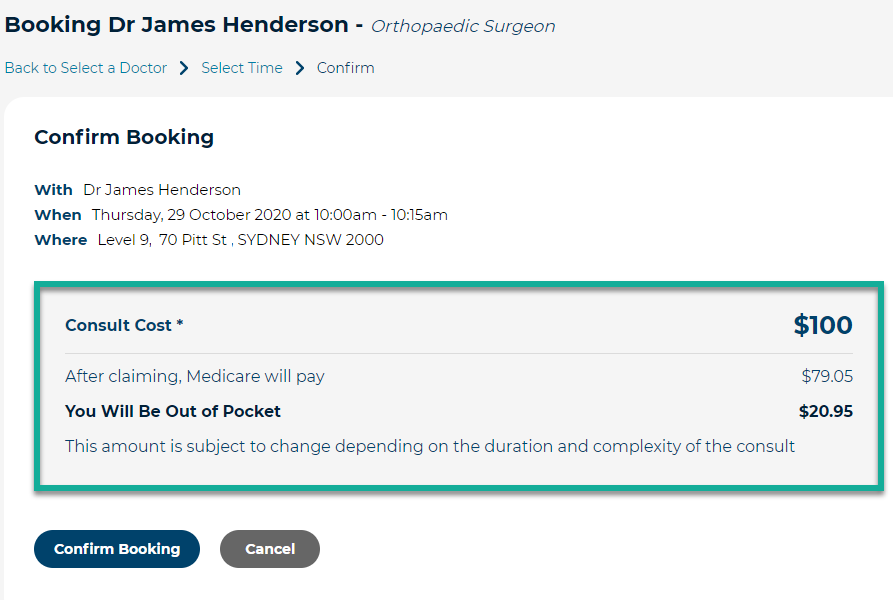
- Click the Book Now button to be directed to the appointment booking window for the provider.
- All available appointment dates and times will be shown to you for the provider who organised the Checkup.
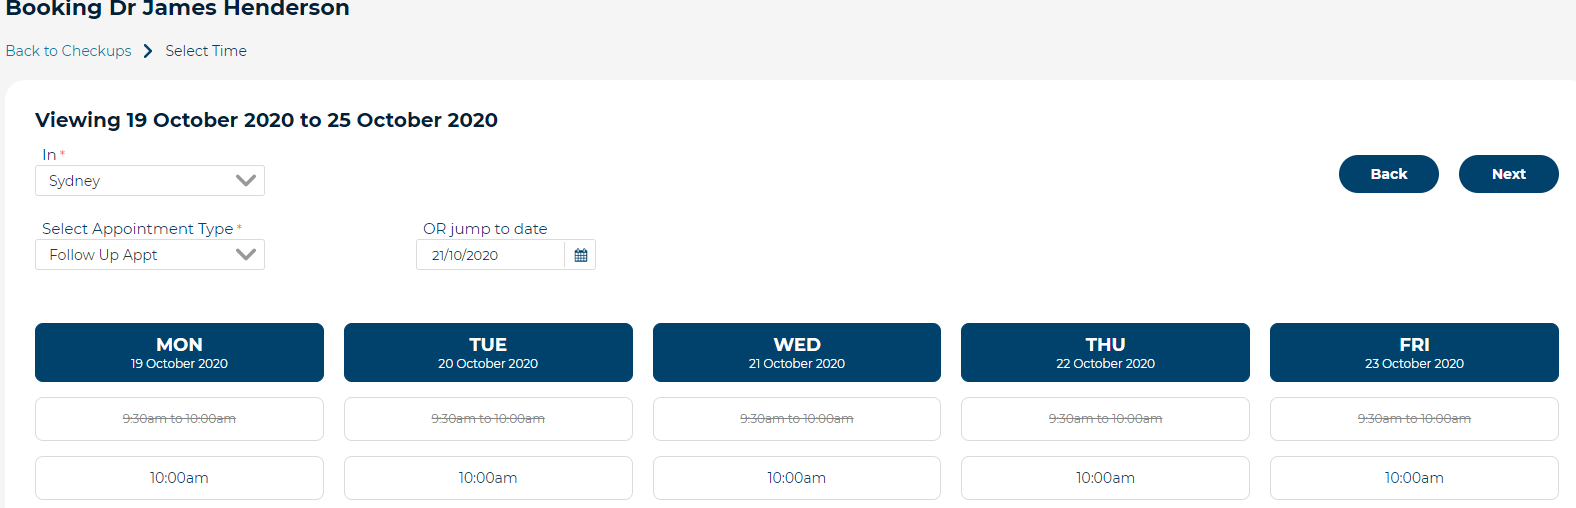
- Select your chosen location for your appointment from the In
drop-down menu (if appropriate).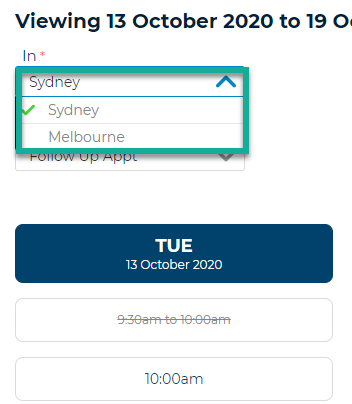
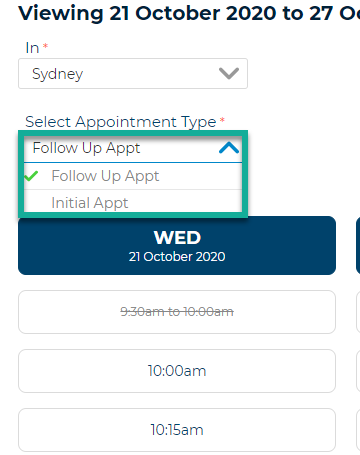
- Choose the appropriate appointment type from the Select Appointment Type menu.
- Select an available appointment date and time from the list provided. Available appointments will display lit up.
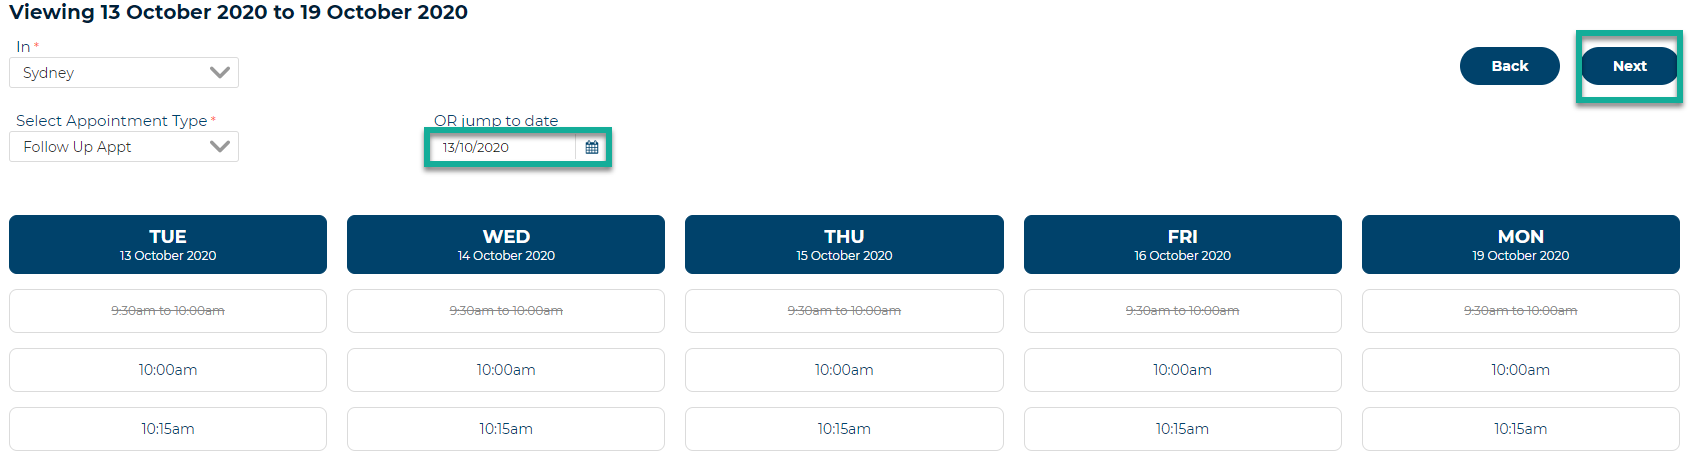
- If you are unable to find a suitable appointment in the list, click the Next button to browse the next page of appointments.
- If you would like to look for appointments after a certain date, you can use the Jump to Date menu to enter your desired date.
- A summary of your appointment details and an estimation of fees will be displayed.
- If you have a referral or supporting documentation to upload, click Upload a File and browse to the location of your document on your computer or phone to upload this.
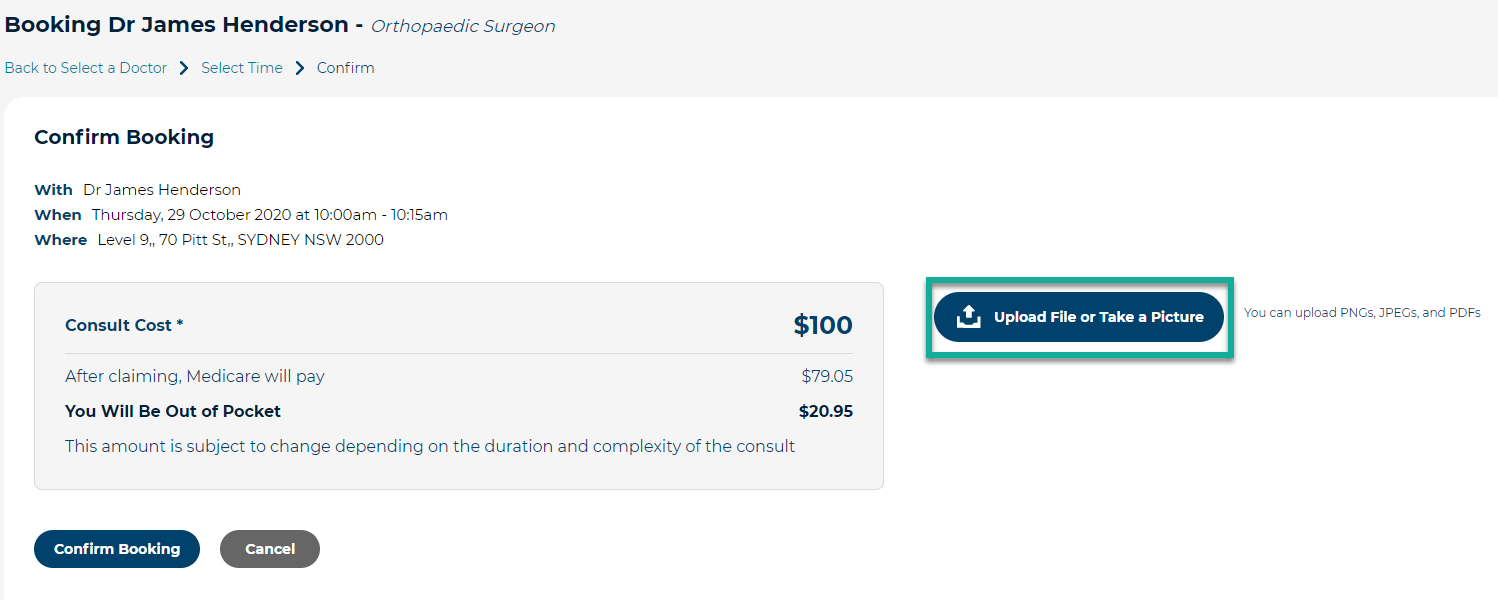
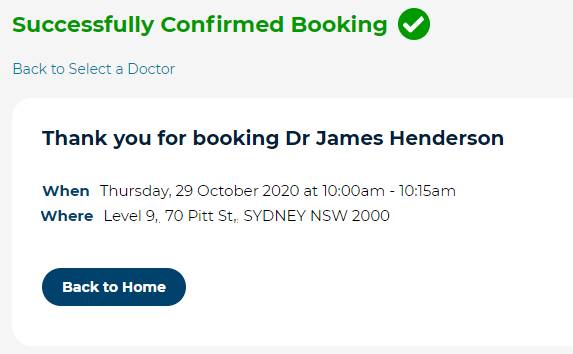
- Click Confirm Booking to finalise your appointment details.
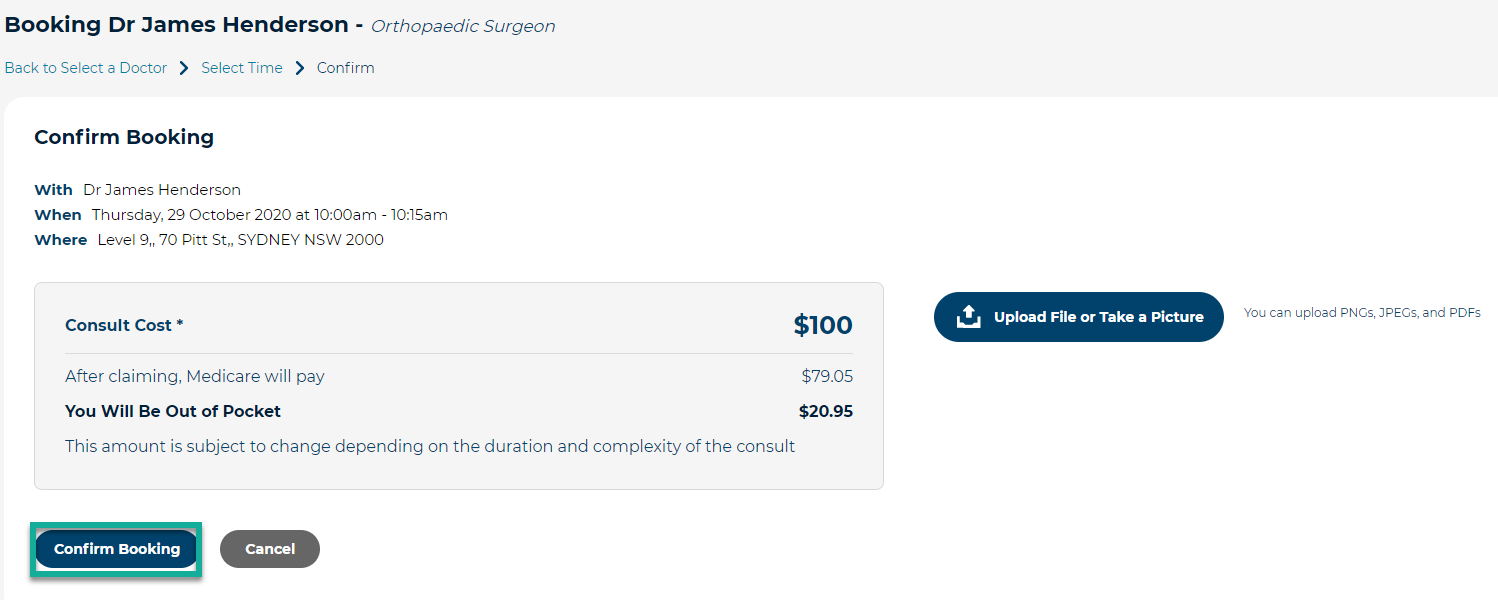
- You will then receive a confirmation page showing the details of your appointment booking.